Tuesday, March 29, 2011

dream catchers


The third graders at Royal Oaks are studying Native Americans for their Multicultural Night and asked me to do a dream catcher lesson.

We purchased some sturdy wire cut in 18" strips and black electrical tape to assemble the hoops. Each child bent their own hoop and I helped fasten the tape on.

Next I distributed 5 pipe cleaners to each child. We attached one end to the hoop and strung on some beads. Next we attached the middle of the pipe cleaner to another end of the hoop and strung on more beads. The pipe cleaner was bent in a "V" and attached at the end. We repeated this step for three pipe cleaners.

(Dream catcher with 2 pipe cleaners attached)

Next we bent the other two pipe cleaners and added beads to the end.
We attached feathers to the end of the pipe cleaners


The feathered pipe cleaners were attached to the hoop to create the part of the dream catcher that hangs down.


Friday, March 18, 2011

Funky Frogs

I got this lesson from Mrs. Brown's Art Page.

We just finished learning about organic and geometric shapes in second grade, as well as opposites, zig zags, wavy lines, curved, lines, and other design concepts. This project has all of those things so it's a great review.

Second grade projects:


Thursday, March 17, 2011

Cardinals and other birds

This lesson is adapted from a cardinal lesson on Deep Space Sparkle. Patti, who runs the website, did this lesson with tempera paint and has the children outline with black paint when they are finished. I am hesitant to use liquid tempera if I don't have to. It's almost impossible to clean up without running water, and I usually don't have access to running water in my classrooms. We used dry tempera paint instead.

I point out to my students that the cardinal is our (North Carolina) state bird! They love the bright colors in this painting. Because we do other cardinal art in the art room, I show the students pictures of other well-known birds and they can adapt their drawing and paintings to create different birds. We look at the hummingbird, the blue bird, and the robin as well!

Third grade work:


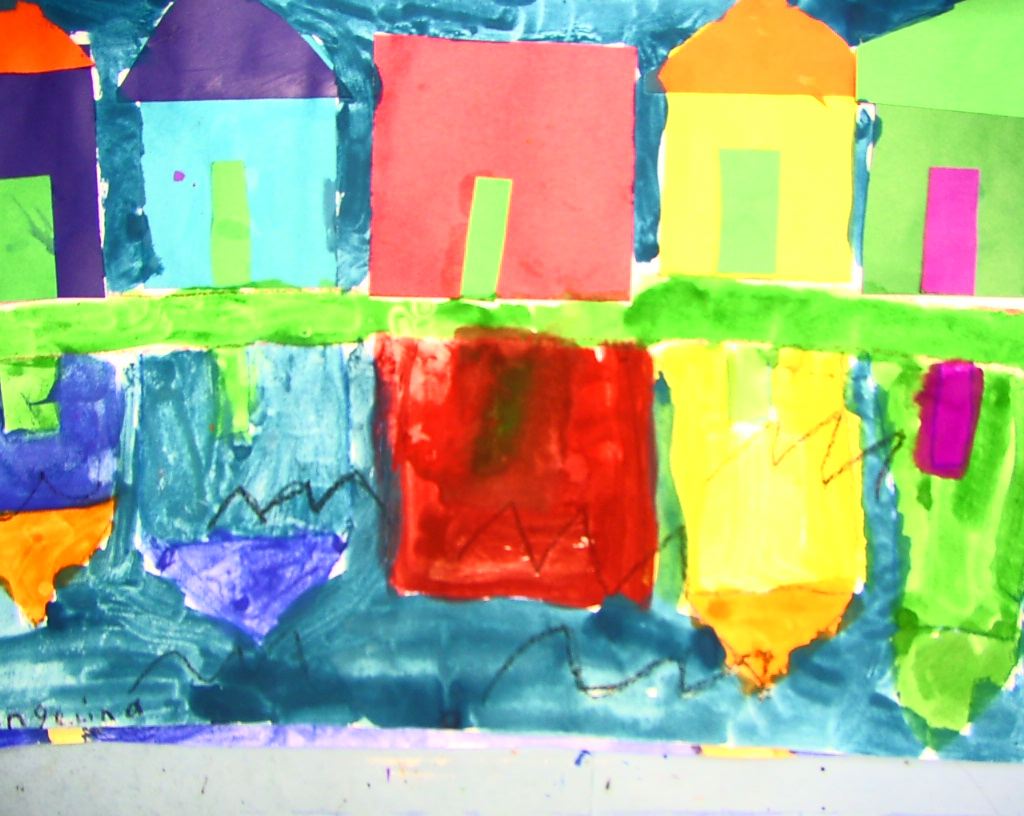
Reflections


This a lesson straight off the deep space sparkle website.  Pattie from the site recommends this lesson for kindergarteners, but I adapted it for first grade.

The first day we drew the ground line and the waves. We then used pre-cut squares to make the buildings. The paper left over from the buildings we used for roofs, doors, windows, etc.


The second day of class we drew the reflections under the buildings and painted them the color that matched the buildings. The rest got painted blue!


First grade work:


I also did a shortened version of this lesson for a class that had missed a day of art. We used smaller paper and only painted:
First grade work:


Wednesday, March 16, 2011

Sunday Afternoon Mural


I purchased this lesson from www.artprojectsforkids.org. She sends you a PDF file with each section the right size on individual pages. There is also a page that shows what the piece looks like when colored in. I put that piece on the Smart Board and added in the corresponding page numbers so the children could see which spot on the mural they were working on.

There are a lot of murals on the site and I thought I would give this one a try. It's a lot of fun and encourages the children to work in small and large groups, instead of individually, something we don't do often in the art room. The children had to constantly check with each other to make sure they were using the same colors for certain things. I liked the way it sparked teamwork in classes that don't always get along!

We printed this on copy paper. The website recommends using drawing paper, which I would do in the future, especially if I was going to have the children paint them or use oil pastel. For color pencils the copy paper worked just fine.

I've gotten a lot of compliments from the administration and other teachers! I'll be doing more murals in the future!

Mexican Weavings


I have experimented with several different looms in the past few years, including home-made looms made from styrofoam containers, and several store bought cardboard looms. I like the larger ones, but they take a long time to complete and children start losing interest in the lesson after a few weeks. I went with the smaller ones this year, about the size of a post card. The products look cute, but the weaving doesn't hold up as well when taken off the loom. I decided to just keep them on the looms and attach a border to them to finish the piece.

I also purchase plastic needles for the project. They make the weaving process easier.

The looms come with instructions for attaching the warp and weft. Some children have trouble tying knots in general but they do just fine otherwise. I show the students photos from the internet of Mexicans making colorful weavings on giant looms to inspire them. After we completed the weaving, the children learned about Mexican designs. I printed some simple designs off the internet and the children copied them with markers and color pencil to make a colorful border!


Tuesday, March 15, 2011

Dancing Cows


I purchased this lesson as a PDF file from Deep Space Sparkle. It costs $5 and you get several lessons along with it, and handouts for the children as well.  I have purchased several products from that particular website and I have always been pleased with them.

I won't give explicit instructions on the lesson, because it was a purchase, but basically we drew the cow step by step and added a background. The next lesson we paint with dry tempera cakes. I really like the dry cakes because they produce paint that isn't too thick or gooey and they are more durable than watercolor cakes.

First grade results: